Tips & Tricks Logic Pro.
-
Hi all, most course examples are based on Cubase. That's fine of course, but for somebody like me who uses Logic Pro less relevant. To prevent other students from reinventing the wheel I thought I create a Tips&Tricks topic for other Logic users. Moderators, since on the course the next page after the assignment page is usually an "example solution" anyway I hope you don't mind sharing this.
Level 2, editing 1, exercise comping:
- Create new project as per normal, adjust tempo
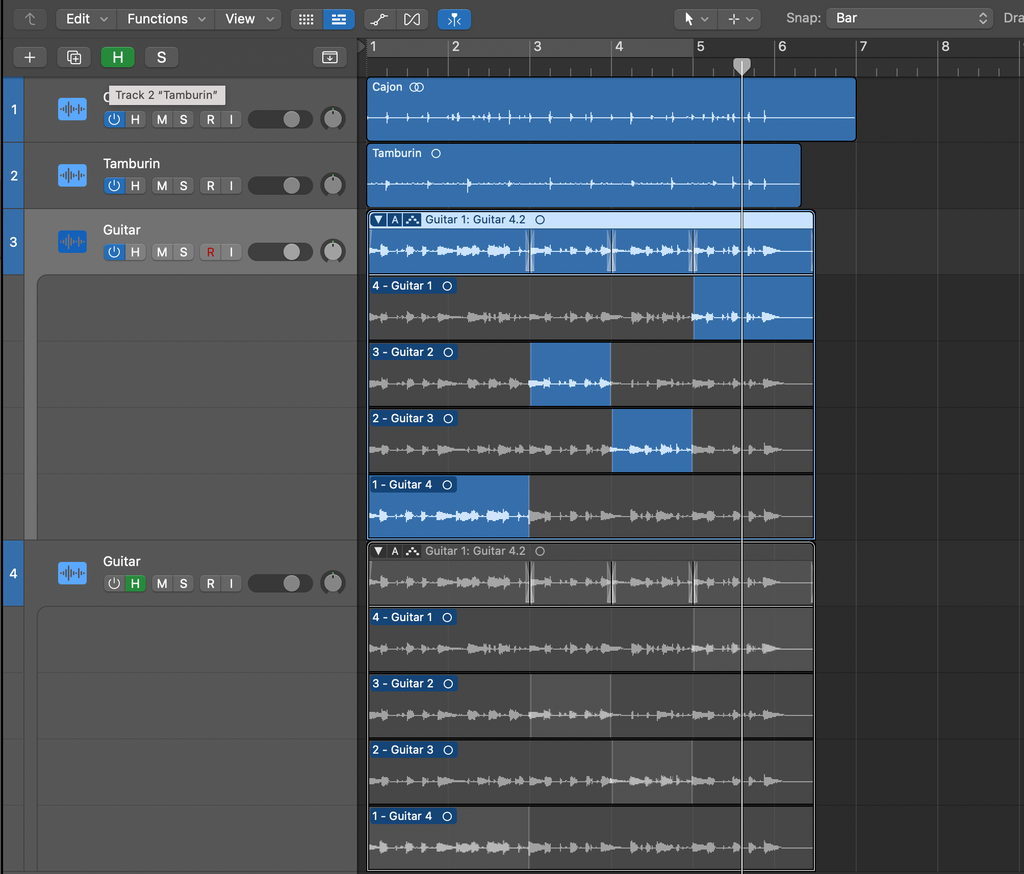
- select the guitar tracks. In the track window, "functions" dropdown menu, Folder -> Pack folder
- track window, "functions" , folder -> Pack take folder.
- comp the 4 guitar tracks as per assignment
- select the used regions in the pack folder tracks
- Command Option G to normalise levels, select desired level.
- Option drag the pack folder track to create a duplicate track with contents.
-
To switch on/off tracks :
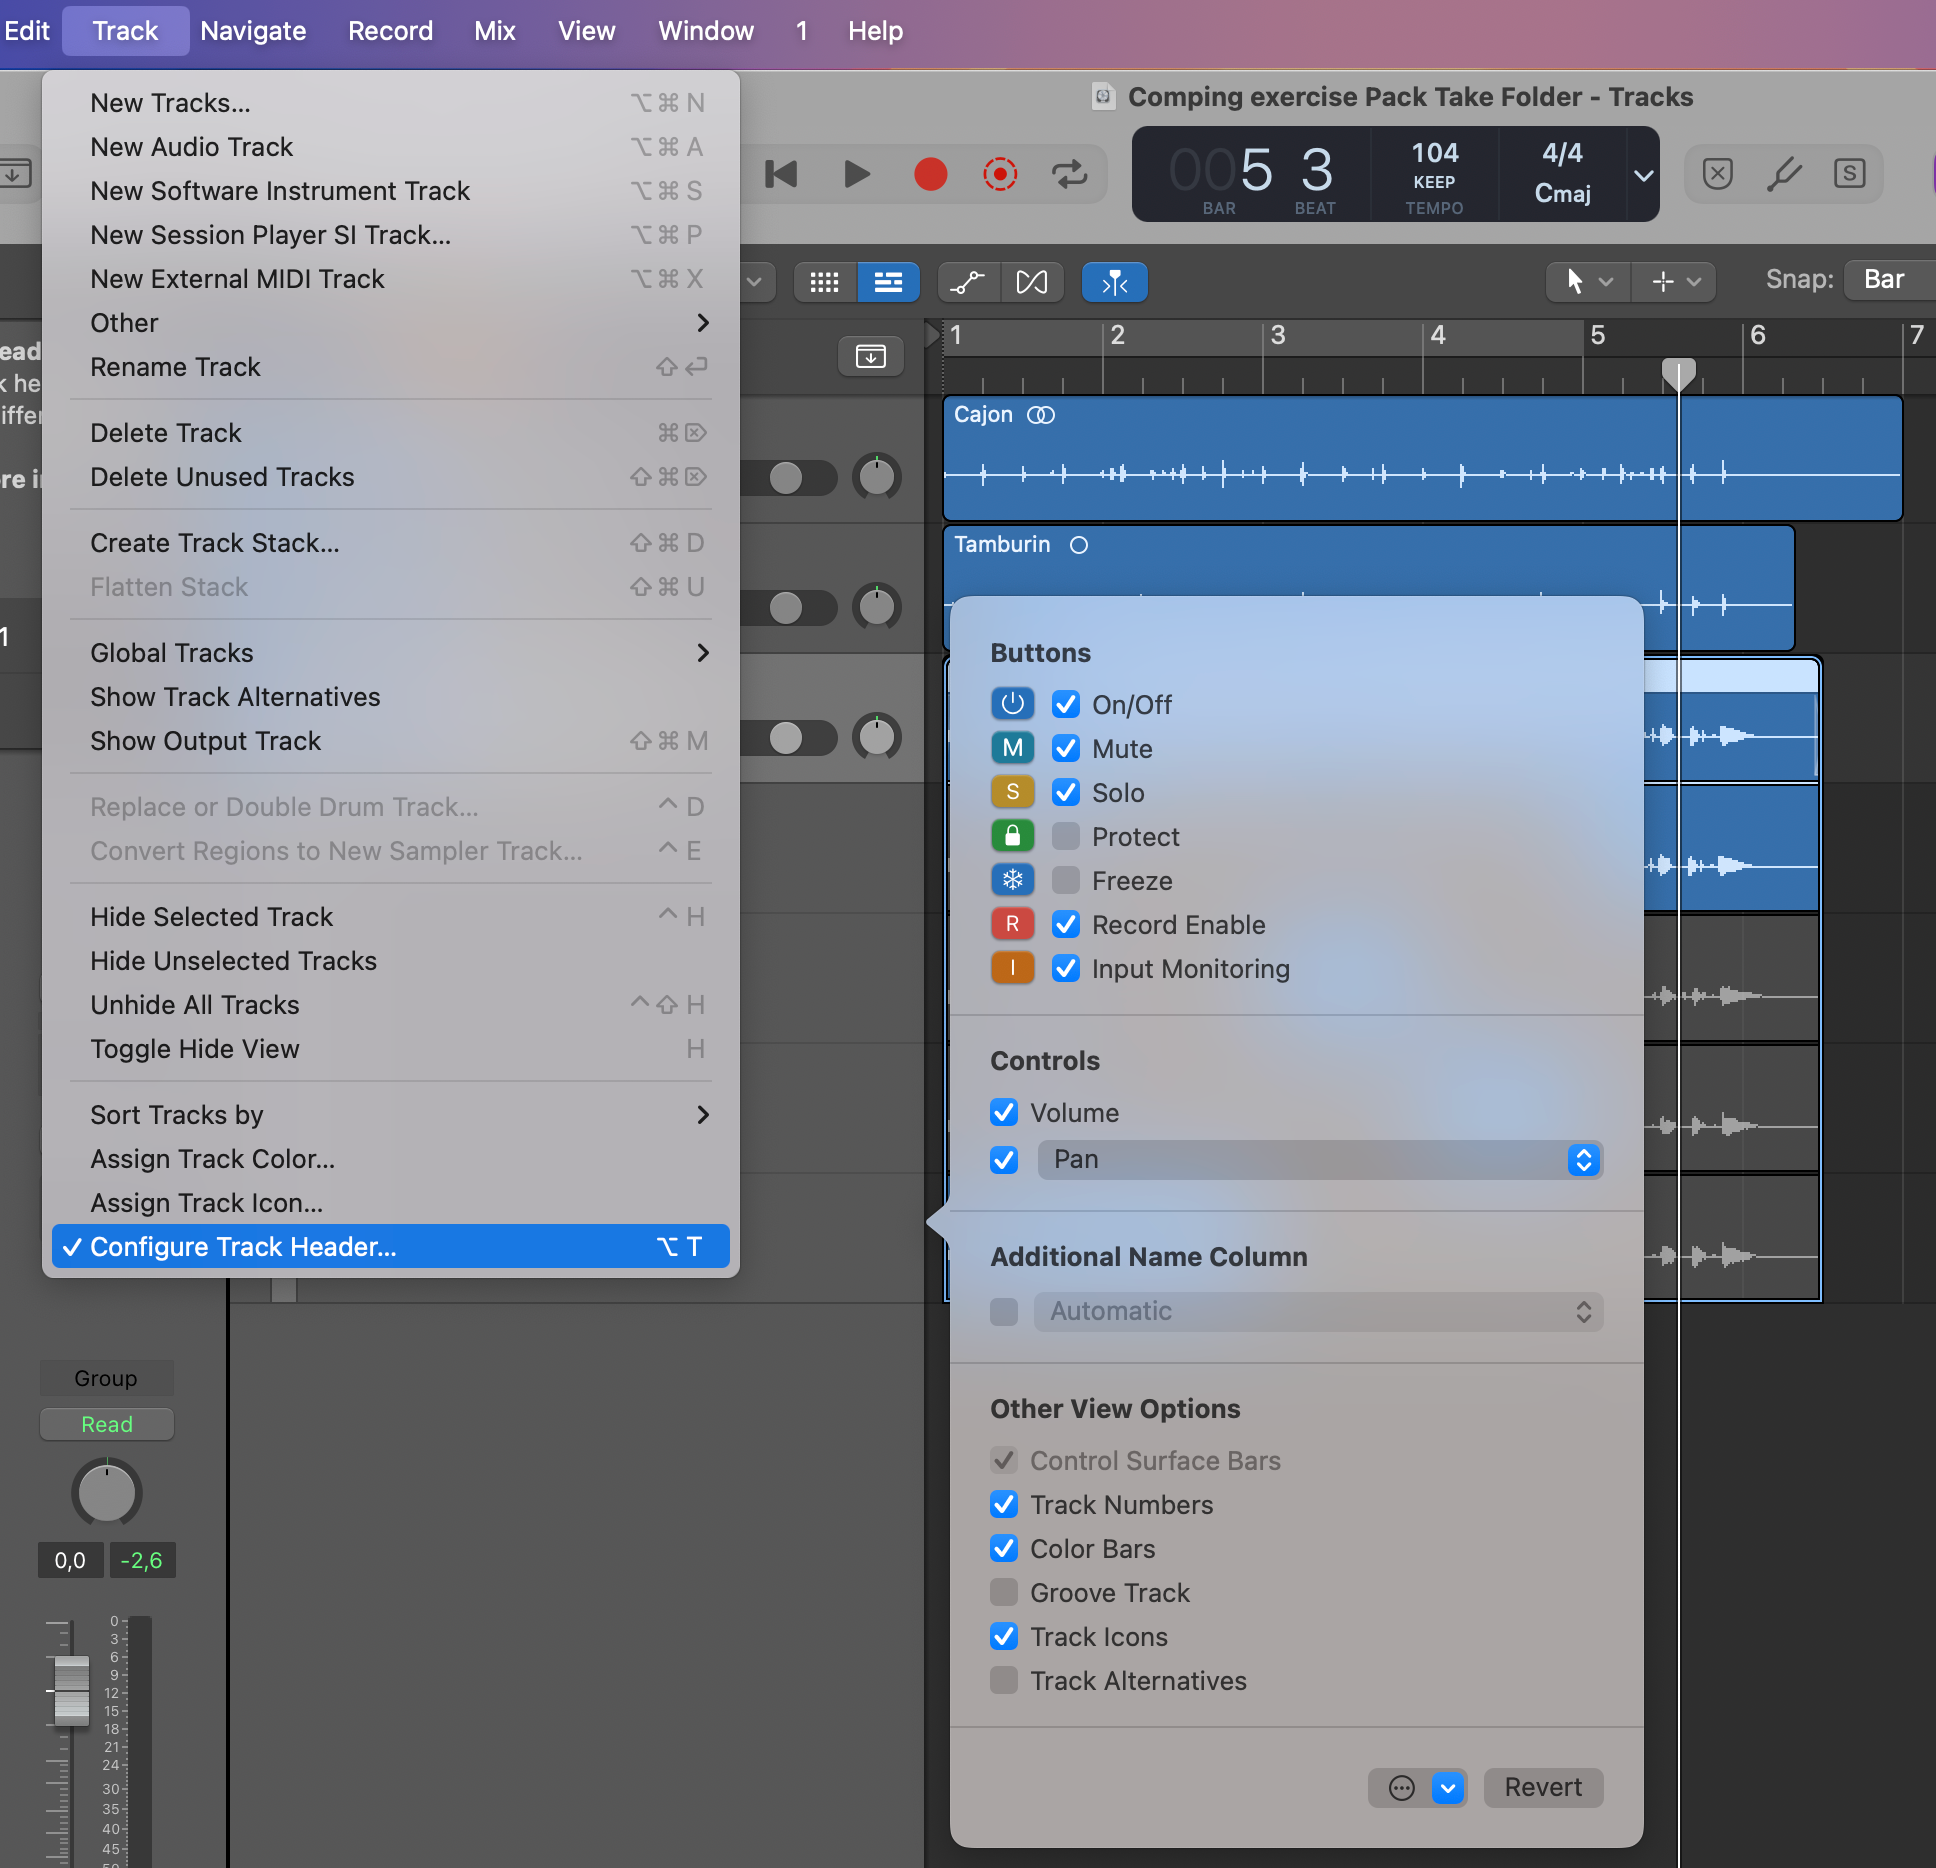
- Main menu "tracks"-> configure track header.
- Under "buttons" tick On/Off. Now all your tracks will have the on/off button.
To hide tracks:
Tracks windows upper left area, click the "H" button, it will turn green.
- Now all your tracks will have an "H" button. Click the button of the tracks you want to hide.
- Click in tracks window upper left area the "H" button again, it will turn orange. The individual tracks that you selected the "H" button on are now hidden.
-
Module 2, editing 1, exercise sine wave cross fade:
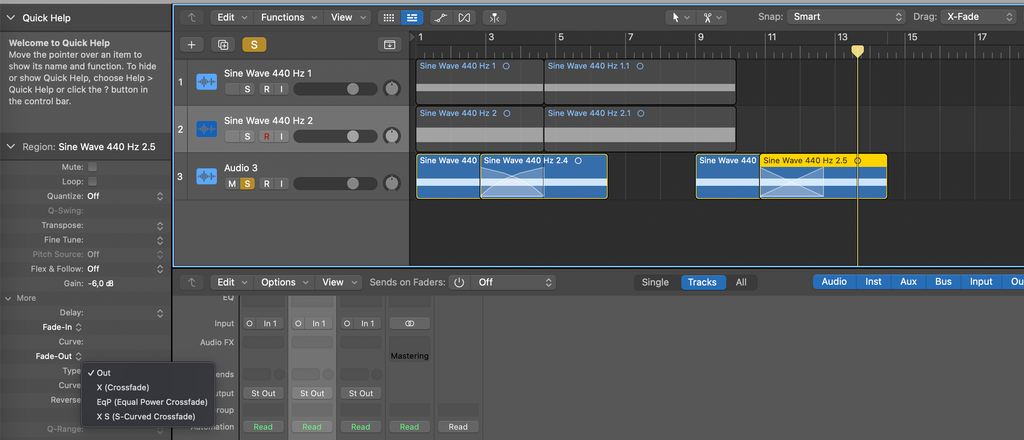
- In tracks window, "drag:" dropdown menu, select X-fade
- In LCD select display mode "time".
- Select regions as per assignment.
- Drag regions as per assignment
- In inspector window on the left hand side select either X(crossfade) OR eqP (equal power Crossfade) depending on assignment.
-
Module 2, editing 1, base editing:
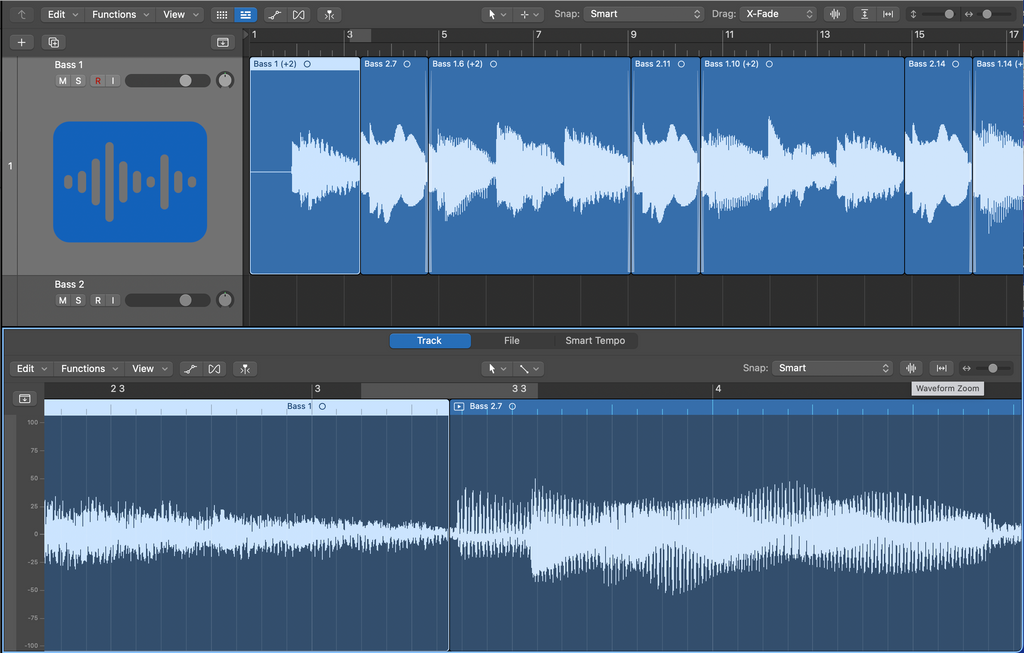
- Make initially rough cuts, then precise cuts at waveform crossing as per example video.
- Use the waveform zoon button to enable precise cutting, see screenshot.
- In tracks window, "drag:" dropdown menu, select x-fade.
- drag selected regions to desired tack, Logic will automatically create a crossfade.
-
Module 1, editing 1, editing multiple tracks:
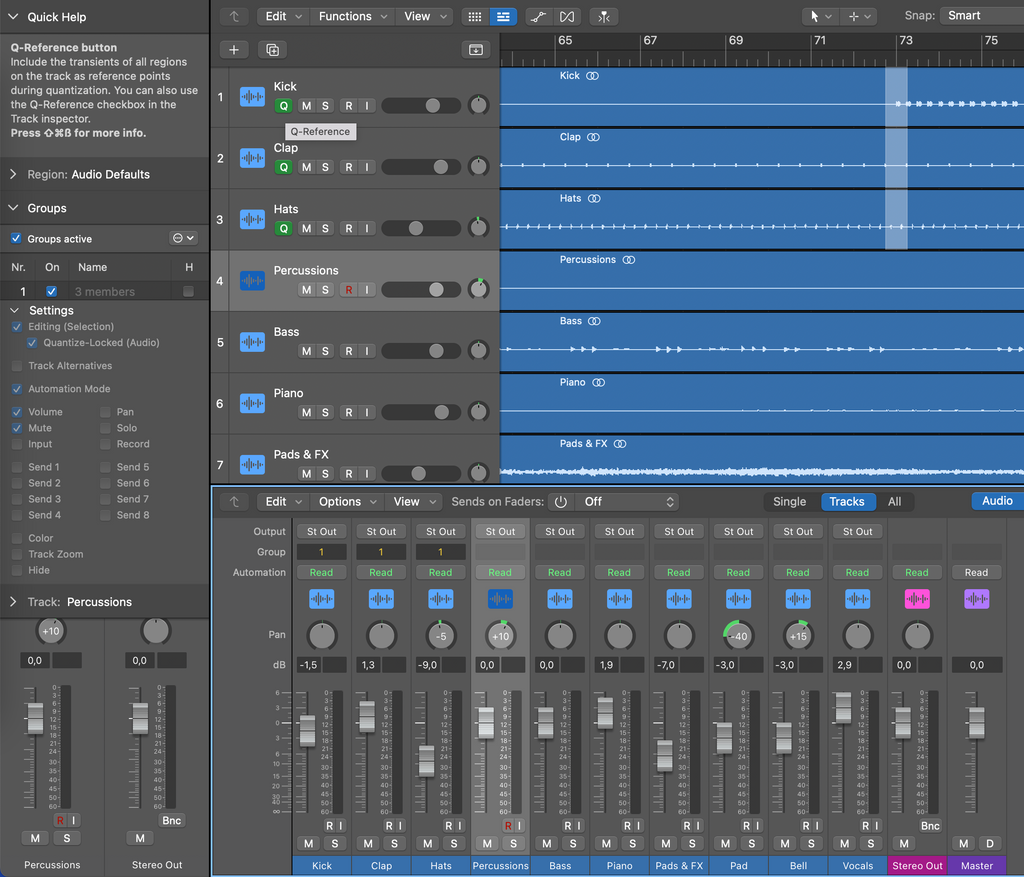
- In the mixer window in the channel strip group slot, assign a group number to the tracks that you want to group.
- (If you don't have the group slot, control click on a channel strip, select "configure channel strip components", tick "group".
- In the inspector window on the left of your main logic window, select the group, settings, tick "editing" and "quantize-locked (audio)". See screenshot. Now the individual tracks will have a green "Q" button (transient analysis).
- Now you can group edit regions while maintaining phase coherency, even with flex-time.
- P.S. If you shift-click the group slot in the mixer window you can assign MULTIPLE GROUPS to a track. Now you can vary the settings per group, e.g. if you want to enable group volume change on some channels in the group but not the others.
-
Module Digital Audio Production 2 - Final Practical Assignment
Lessons learned:
- Logic pro channel strips use 32 bit (or 64 bit) floating point data, and since floating point comes with a + or - bit you have about 1500dB headroom, it's therefore practically impossible to clip the channel and having the peak indicator turning red is not necessarily bad. It is of course advisable to keep the levels in check.
- The stereo out, which in stereo project you normally use to bounce your project, is 24 bit fixed and zero dBfs is the brick wall. That's why you need to keep it between -3 and -6 dBfs PEAK (not VU or RMS) to have a little headroom.
- Any metering you do is PRE-FADER. So you can have your level meter nserted in a stereo out plug-in slot, having it reading a little hot and you might decide to lower the stereo out fader a bit, only to discover that your bounce is still too hot...
- If you want to reduce your level in the stereo out, perhaps better to keep the stereo out fader at zero dB and insert a Gain tool in the stereo out strip (before the metering plug-in!). Even better is to keep the levels in your individual channel strips a tad lower.
- When you print your project in the bounce menu, for the love of $Deity, keep normalise unticked, otherwise the project will be analysed and the overall level adjusted so that the peak is at zero dBfs.
- When you have bounced your project, add it in your project on a new audio channel, just to check the levels. Keeps you from making silly mistakes, e.g. bouncing with the loop markers on or (some) channels muted. The bounce takes loops and muted channels into consideration.
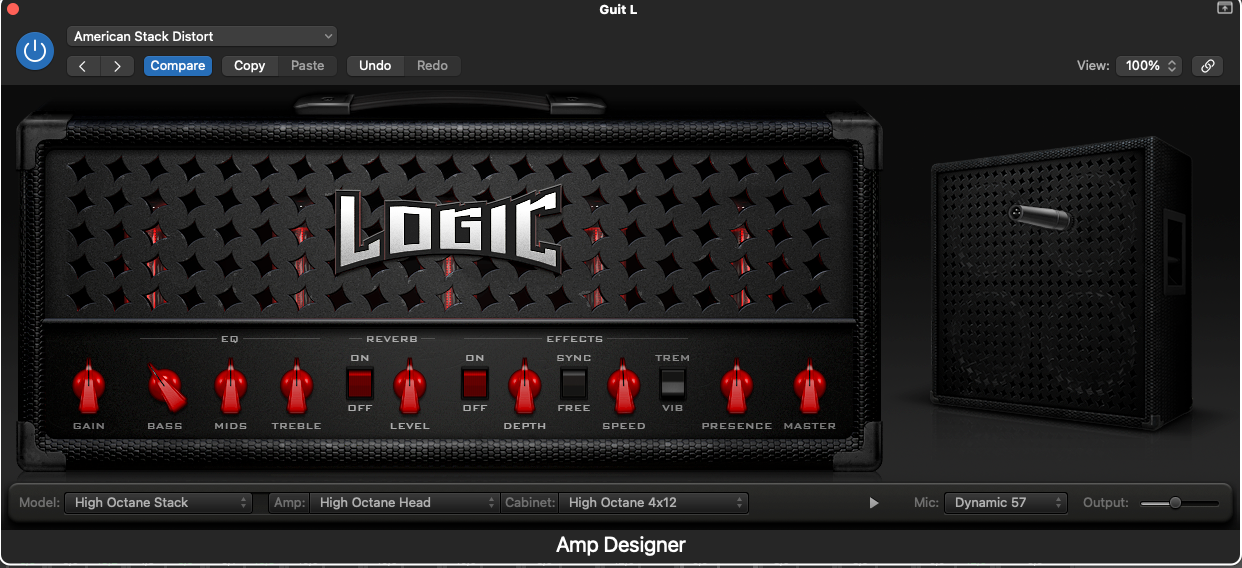
An explanation about Amp Designer models in Logic Pro: Amp models
I used the high octane stack, with the mic changed to a SM57. Keep in mind that if you move the mic off axis you will lose quite a bit of treble.
Signal routing for the slap delay and the ping-pong delay:

Slap delay setup using the stock stereo delay:
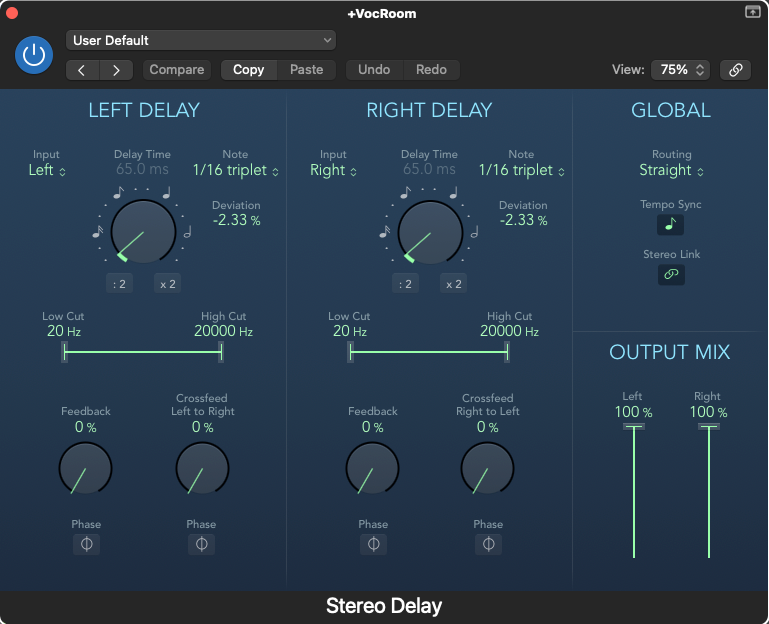
Ping-pong delay, since logic 11 a built in effect in the stock stereo delay:

-
Mixing 4, drums grouping exercise.
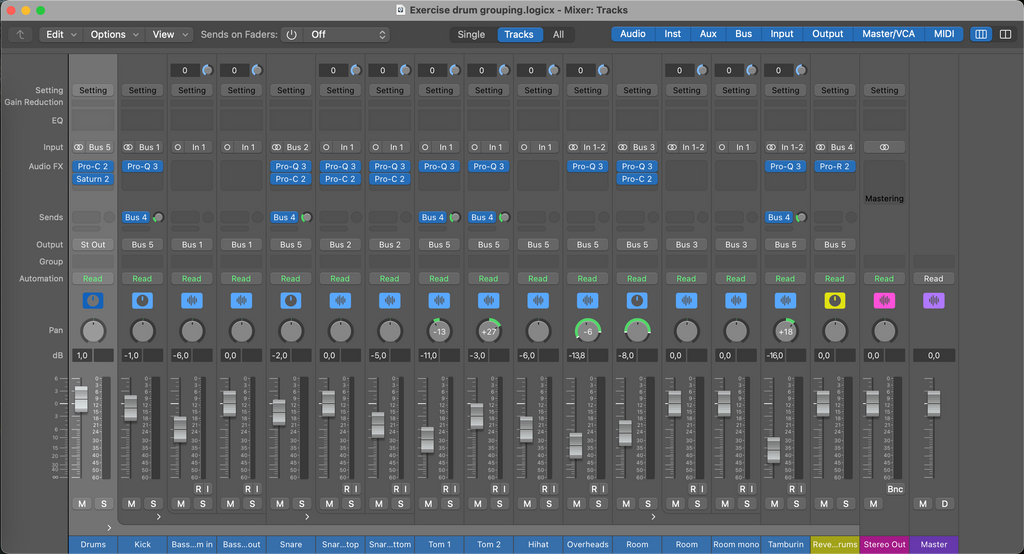
Kick, Snare, Room summing stacks, remaining individual channels and reverb aux inside a Drums summing stack.
